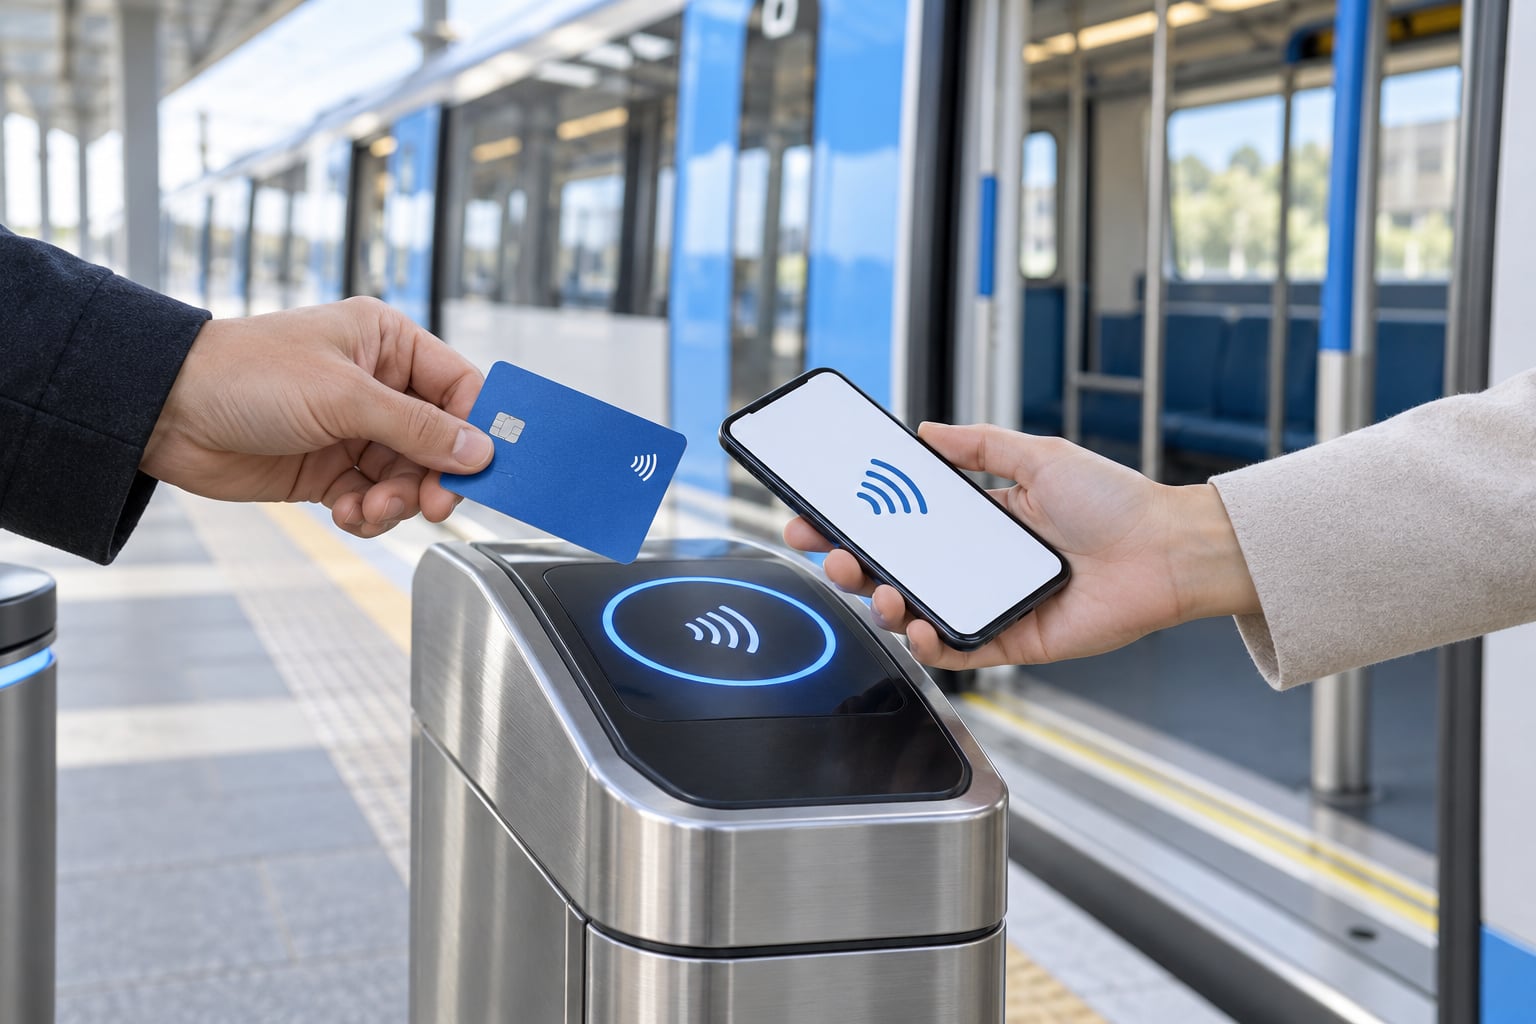
Using a tap to pay credit card on buses and trains takes about ten seconds per boarding: hold a contactless card or phone against the fare reader, wait for the confirmation light, then walk on. No ticket queue, no balance to top up, no coins. The catch is that every network has its own rules about where you tap and whether you tap once or tap in and tap out, so the motion is simple while the details stay local.
Here is the 60-second version:
- Check your card for the contactless symbol, or check your phone for NFC with a card loaded in the wallet.
- Board first, then tap at the reader. Do not tap while walking past it.
- Hold the card flat and still for about a second, then wait for a green light or a check mark.
- Tap again at the exit reader anywhere the system works as tap in and tap out.
- Every passenger needs a separate card, because one tap pays for one rider.
Everything below is the longer version, including what to do when a reader beeps once and the light stays red.
Table of Contents
- What You Need
- Step-by-Step
- Check That Your Card or Device Works
- Find the Right Reader
- Tap and Wait for Confirmation
- Board and Check the Trip Status
- Handle Transfers, Concessions, and Multiple Riders
- Common Mistakes
- Frequently Asked Questions
- Can I tap a contactless credit card directly onto a bus or train?
- Can I use Apple Pay, Google Wallet, or Samsung Wallet instead of my physical card?
- Do I need a paper ticket when I pay by tapping my card?
- Does tapping a credit card on transit use a daily fare cap?
- What should I do if a transit payment is missing or appears twice?
- Conclusion
What You Need
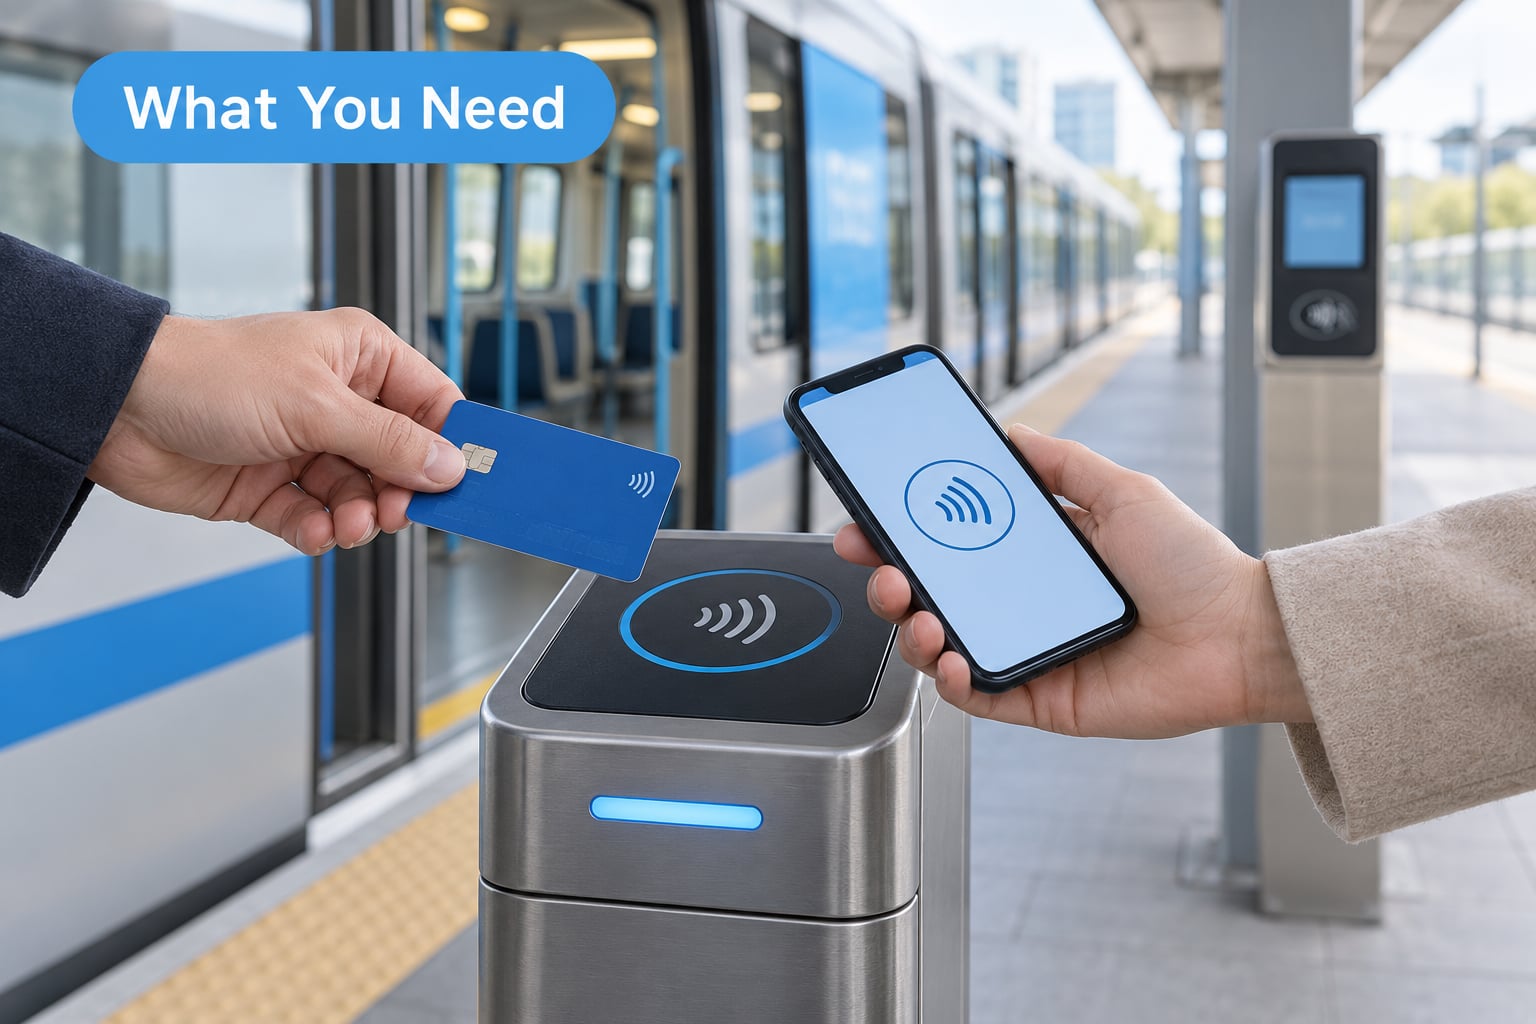
Most riders need one thing: a bank-issued card that carries the contactless symbol. That is the four curved lines that sit next to the chip on Visa, Mastercard and American Express cards, and it means the card has a chip that can be read without inserting or swiping it. Almost every card issued in the last decade has it, so the plastic in your wallet is usually good enough.
Cards without that symbol will fail. Magnetic-stripe-only cards, some prepaid or store cards, gift cards, library cards and corporate ID badges all read as nothing at the fare reader. The same goes for a virtual card number sitting in an app, because a number has no chip to power it. What works is the physical card, or a token stored on a phone or watch.
A phone or smartwatch is the other route. Both Apple Pay, Google Wallet and Samsung Wallet hold a bank card and present it to the reader the same way, so a rider without a physical contactless card is not stuck. One catch worth knowing: some networks accept a physical card but not every mobile wallet, or the reverse, so check the transit authority’s accepted-device list before you travel rather than at the gate.
You also need money available on that card. A card with an empty balance is declined, and some card issuers block certain merchant categories, which can include transit taps on a given day. If your card was issued outside the country you are riding in, check whether your bank adds a foreign transaction fee, because those fees stack quietly over a week of daily riding.
Two things people confuse on day one. A contactless bank card is not a transit card. Cards such as OMNY in New York, the TAP card in Los Angeles, Oyster in London, Compass in Vancouver or Suica in Japan are stored-value products that you load with money in advance, and they work on their own network only. A bank card is open-loop: you pay the network’s fare directly, with no balance to manage. They are not interchangeable, and a stored-value card will not work at an ordinary shop terminal.
Before you leave, confirm two things with the local operator: that card taps are accepted on the specific lines you plan to ride, and whether a paper ticket is still needed for anything. Keep a second card and a little cash as backup, since readers do go offline. If you already hold a period pass, take it out of your phone wallet before you ride, because a wallet can be asked to present the wrong card and leave you charged twice.
Step-by-Step
Check That Your Card or Device Works
Start on the physical card. Turn it over and look for the contactless symbol near the chip. If it is there, the card is ready as-is. There is no activation step and no separate transit application, which surprises people who expect to enrol the card somewhere first.
For a phone, three checks matter. Turn on NFC in the device settings, add a current, unexpired card to the wallet, and confirm which card is set as the default for contactless payments. Then test the setup through the wallet itself, for example by making a contactless payment at a shop, rather than spending a fare to find out. Menu names shift between operating system versions, so look in the wallet app and the device connection settings rather than guessing at labels.
Watches behave slightly differently. A watch with the card loaded usually taps without unlocking, which makes it the smoothest option for a rider carrying a phone, a bag and a coffee. The tradeoff is battery: if the watch is flat at the platform, the tap fails with no fallback.
One more test is worth doing at home, and it is free. Open the wallet or your bank app and look at recent transactions. If a contactless payment you made recently appears, the card and device are fine. If the card sits in the wallet but you have never tapped anything with it, keep the physical card with you on the first journey as a backup.
Find the Right Reader
On a bus, the fare reader sits at the front door, usually on a post near the driver or on the wall by the entry. It carries the contactless symbol. Tap as you get on, or as you step down from the curb, but before you move into the aisle, because the driver needs a clear path.
On a train or subway, the reader is built into the turnstile or the fare gate. Tap on the reader pad, wait for the light, then push through. Readers are sometimes on the face of the gate you approach and sometimes on the top, so look for the symbol and follow the arrows painted or printed above the lane.
Not every device on a platform is a fare reader. Ticket vending machines, ticket machines that print paper, help points, retail terminals inside the station, and validators belonging to a different operator will not take your fare payment. On systems with separate entry and exit, one side is tap in and the other is tap out, and some exits are exit-only, which means the reader there will not open the gate on its own.
Prepare before you step up. Riders who dig through a bag at the front door hold up everyone behind them, and drivers notice. Have the card in your hand, screen unlocked if you are using a phone, and know which reader you are aiming for.
Tap and Wait for Confirmation
Hold the card flat against the reader, not on edge, and not moving. Roughly a second of contact is enough. Do not swipe, because a swipe gesture is aimed at a magnetic-stripe reader and will not register on a contactless pad.
Then wait. A green light, a check mark on a small screen, or a short confirmation tone means the tap was accepted. One beep with a red light or a blank screen usually means the tap was declined, and the usual causes are a card without the contactless symbol, an empty account, a blocked card, or a phone that has not finished unlocking.
Readers are not fast. Give the machine a moment before you try again, and if you must tap again, tap once more rather than several times in a row, because repeated taps are one source of the duplicate charges riders complain about. Boarding is not valid just because your card was near the reader, either. If the gate did not open and the driver gave you no signal, ask before you sit down, and a photo of the reader and your card taken at the time settles most arguments later.
Board and Check the Trip Status
Once you are moving, it is worth confirming the trip landed. On tap-once systems, a fare is charged as you board and the payment appears in your bank app or wallet within a minute or two. On tap-in and tap-out systems, the entry tap is only half the journey and the system calculates the fare once you tap out.
Many postpaid systems put a small placeholder amount on your card at the entry tap, then settle the real fare later. A small first charge followed by a larger one is normal, not a duplicate. It is also the reason a statement can look strange a day or two after the trip, since the settled amount may post to a different date.
If no trip shows up at all, act while you are still there. Tell the driver on a bus, or find staff at a gate or station, and ask them to check the machine. Riders report that this is the single most useful step after a failed tap, because staff can see the reader’s log even when your bank statement shows nothing. Only after that, check your own records.
For your own file, keep the fare receipt if one was given, note the route and time, and check both the transit operator’s account portal and your card statement before raising anything. A charge that is missing from one system and present in the other is usually just a delay, not an error.
Handle Transfers, Concessions, and Multiple Riders
One tap pays for one person. A family cannot ride on a single tap from one card, and asking the driver to let four people through on one fare is the fastest way to get removed from the bus. Each passenger needs a card, phone or watch, or a registered transit card that covers the group.
Transfers usually need a second tap. Many networks require you to tap on a transfer reader shortly after boarding, or simply tap in again at the next station, and the system then applies the transfer discount. Some agencies give the discount automatically when the same card is used, others require a registered transit card, and a few apply no transfer discount at all to bank card taps. This is one of the biggest differences between cities, and the operator’s page is the only reliable answer.
Discounted fares are where card taps stop working. Student, senior, child and disability fares usually need a registered transit card, a concession card issued by the agency, or a photo ID shown to staff, because the system has to know who is eligible. Banking a child onto a family’s card does not work. If you qualify for a concession, arrange it before the trip, not at the reader.
If your wallet holds several cards, some phones let you choose the default, and it is worth setting that deliberately. Otherwise the phone may present the card you are not expecting, which is a common cause of a fare landing on the card you had meant to save for something else.
Common Mistakes
Nearly every problem riders report comes down to one of a handful of things, and each has a fix you can practise before you travel.
- Tapping too quickly. Move away before the reader finishes and the tap is discarded. Hold the card still for a second and wait for the light.
- Swiping instead of tapping. A swipe targets a magnetic stripe. Flat against the symbol, and do not drag it.
- Card still inside a case. A thick wallet, a metal case or a card sleeve can block the chip. Take the card out or move it to the edge of the holder.
- Wrong reader. Ticket machines, help points and shop terminals inside a station are not fare readers. Look for the contactless symbol on the validator or gate.
- Tapping an exit-only gate on the way in. On some systems the entry lane is the only one that opens on a tap. Follow the marked direction.
- No funds or a blocked card. An empty balance, a spending limit or an issuer block all produce the same declined tap. Check the card in your banking app before you leave the station.
- Unsupported device or card. Some readers reject a phone wallet that works fine elsewhere. Carry the physical card as well.
- A period pass still in the wallet. Two cards, one for the pass and one for fares, can produce two charges for one trip. Remove the pass card from the wallet while you are riding.
- Trying to pay a fare with a stored-value transit card at a shop terminal. Transit cards are network-locked. A transit card balances at a ticket machine, not at a retail terminal.
- Reading a small first charge as a failure. A placeholder amount on a postpaid system is normal, and the settled fare arrives separately.
Here is what the reader itself is telling you:
| What you see or hear | What it usually means | What to do |
|---|---|---|
| Green light or check mark | Tap accepted and the fare is recorded | Board |
| Short confirmation tone with a green light | Accepted on most systems | Board |
| One beep, red light, no screen response | Declined, or the reader did not finish reading | Wait, then tap once more; if it fails again, tell the driver or staff |
| Nothing at all, gate stays shut | Card lacks the contactless symbol, wrong reader, or device not unlocked | Check the symbol, move to the correct reader, unlock the phone and retry |
| Screen shows a small amount, fare posts later | Placeholder hold on a postpaid system | Keep riding and check the settled fare the next day |
| Reader dark or showing an error sign | Machine out of service | Ask the driver or station staff, and pay another way if offered |
Etiquette is a small item with a real effect on your journey time. Tap on boarding, not while walking down the aisle, and keep the queue moving. On a bus, most riders tap at the door and sit down immediately, and drivers generally prefer it that way.
Frequently Asked Questions
Can I tap a contactless credit card directly onto a bus or train?
Yes, on any network that accepts open-loop payment. Look for the contactless symbol on the reader at the bus door or on the turnstile, hold your card flat against it for about a second, and wait for a green light or check mark. The fare is charged straight away, or later if the system calculates it when you tap out at your destination.
Can I use Apple Pay, Google Wallet, or Samsung Wallet instead of my physical card?
Usually, yes, on networks that support mobile wallets. Load an unexpired bank card into the wallet, turn on NFC, and set your default card before you travel. Some agencies accept a physical contactless card but not a particular wallet, and the reverse happens too, so check the operator’s accepted-device list. Keep the physical card as backup if the phone is flat.
Do I need a paper ticket when I pay by tapping my card?
On most systems, no. A card tap records the fare electronically and acts as your proof of payment, so a printed ticket is not needed. A few networks still require a paper ticket for particular services, such as long-distance or reserved-seat trains, or for riders who qualify for a concession fare. Check the agency’s service page for your specific route.
Does tapping a credit card on transit use a daily fare cap?
Not always. Some systems apply a cap automatically to any card they recognise, while others tie the cap to a registered transit card only, and a plain bank card tap then costs the full fare every trip. If you ride more than twice a day, a registered card or a day pass is often the better deal. Confirm the rule on the operator’s fares page before you rely on it.
What should I do if a transit payment is missing or appears twice?
Check the transit account and your card statement first, since postpaid systems post a placeholder and a settled fare separately, and many operators list completed trips in an account portal. For a genuinely duplicate charge, contact your card issuer with the date, route and amount. For a tap that never registered, the operator is the right contact, and staff can check the reader log.
Conclusion
Here is the whole procedure on one screen:
- Confirm before you leave that card taps are accepted on the lines you are riding, and check whether your device or wallet is on the accepted list.
- Bring a contactless bank card, or a phone or watch with an active card and NFC turned on, plus a backup card.
- Board, then use only the fare reader, never a ticket machine or a shop terminal.
- Hold the card flat and still, wait for the green light, and tap again at the exit where the system works as tap in and tap out.
- Give every passenger their own card, and arrange concession fares in advance.
- Check the transit app or your bank record for the fare, the settled amount and any cap, and ask staff on the spot if a trip never appears.
The skill takes about a minute to learn, and the local rules are what trip people up. If you follow the plan above and confirm your network’s specifics before you board, tapping your way around a city in 2026 is the least complicated part of the trip.