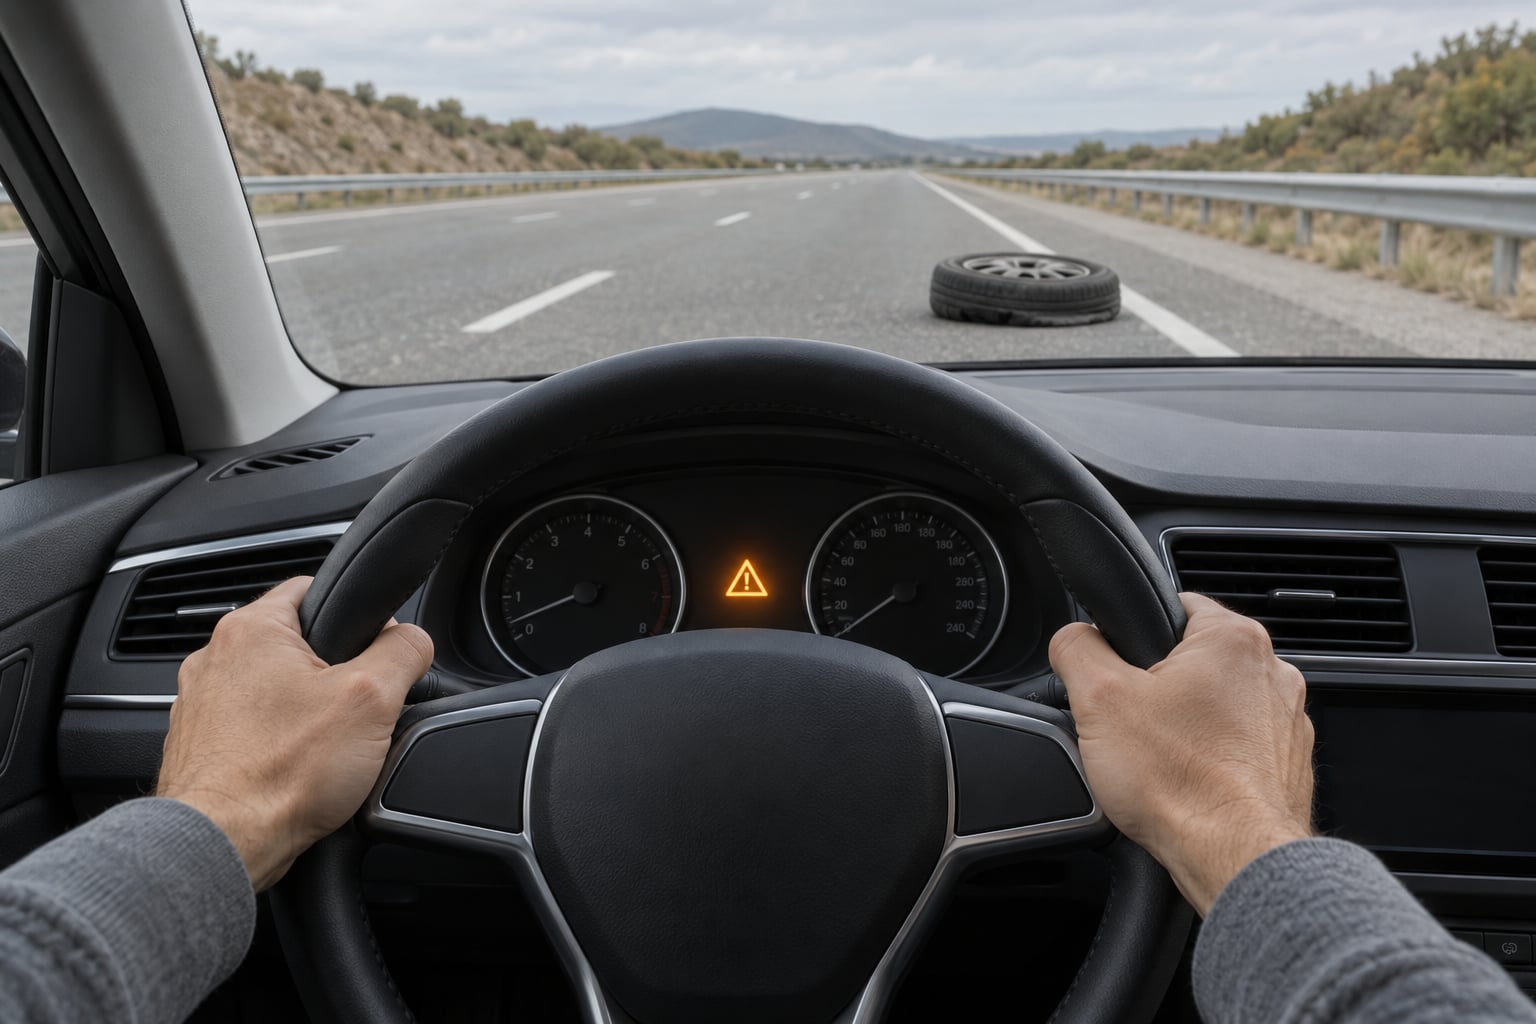
A tire blowout at speed is controlled with your right foot and your steering wheel, not your brakes. Grip the wheel firmly, stay off the brake pedal, ease off the accelerator, and steer straight while the vehicle slows on its own. Then signal, move to the shoulder, and stop as far from traffic as you can.
Knowing how to handle a tire blowout at speed is mostly a matter of what you do not do. Most tire blowouts are survivable. The ones that end badly involve a driver who reacts in the first half second by stabbing the brakes, yanking the wheel, or turning toward a shoulder that is not there.
What you feel is loud and violent: a bang, a jolt that yanks one corner of the car, and a low rumble that sounds like the tread is dragging on the pavement. Your instinct will be to brake. Resist it for the first several seconds and you keep the car. That sequence takes about two minutes from the bang to a full stop, and knowing it in advance matters more than any equipment.
Table of Contents
- What You Need
- Step-by-Step: How to Handle a Tire Blowout at Speed
- Step 1: Stay Calm and Keep Both Hands on the Wheel
- Step 2: Ease Off the Accelerator and Maintain Control
- Step 3: Steer Toward a Safe Place to Stop
- Step 4: Pull Completely Off the Road
- Step 5: Make the Vehicle and Roadside Area Safe
- Step 6: Inspect the Tire and Decide Whether to Drive
- Step 7: Replace the Tire or Call Roadside Assistance
- Common Mistakes
- Frequently Asked Questions
- What happens if a tire blows on the highway?
- Should you brake hard when a tire blows out?
- Why is a front tire on the driver’s side the most dangerous?
- What to do if you blow a tire and have no spare
- How long can you drive on a blown-out tire?
- What causes a tire to pop?
- What to Do First
What You Need
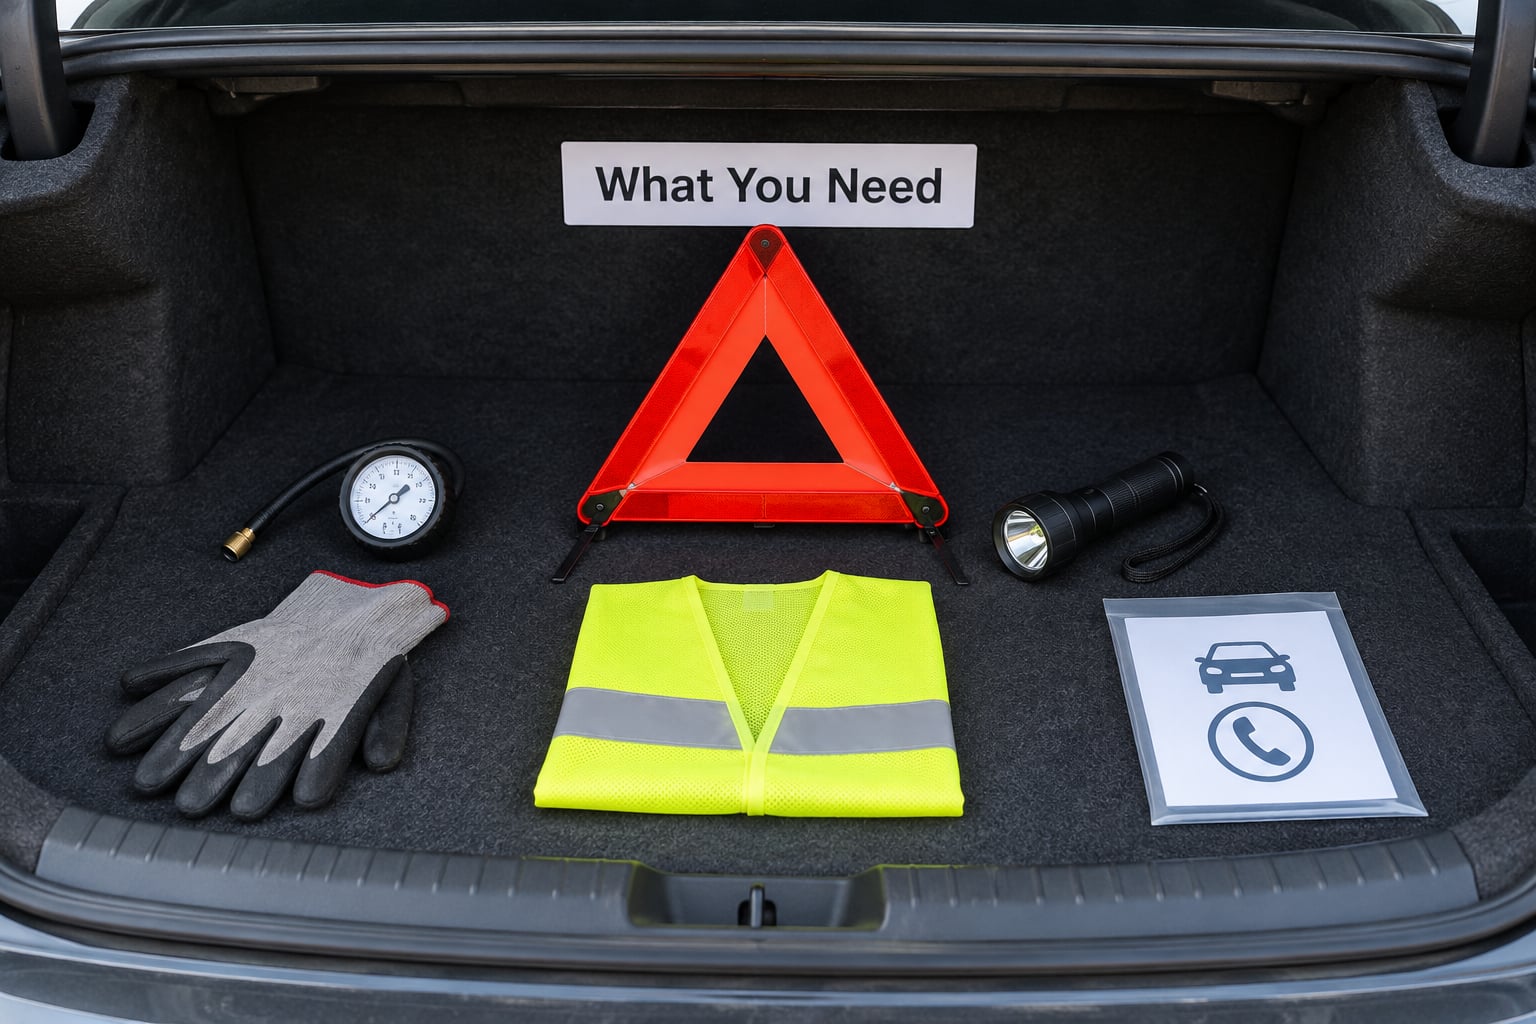
None of this gear saves you during the blowout itself. It is there for the ten minutes after, when you are sitting on a shoulder with traffic going past at seventy miles an hour. Get the kit together before the trip, not during it.
- Tire pressure gauge — a pencil gauge costs little and tells you whether a tire is low, high, or simply old.
- Portable inflator — the small 12-volt models in a trunk can get you to a service station rather than a stopped lane.
- Warning triangles — two is standard on a road with a wide shoulder, three if the car is stopping on a narrow one.
- Reflective vest — a plain white t-shirt helps. A vest helps more, and it takes up no room.
- Work gloves — a wheel that has been sitting on pavement at speed is rough to handle bare-handed.
- Flashlight — a roadside change on an unlit stretch of highway is where a phone battery is least reliable.
- Roadside assistance card or app — know the number before you need it, and know whether your insurance or your manufacturer covers it.
- Jack and lug wrench that fit the vehicle — the factory tools are in the trunk on most cars, but a space-saving spare often comes with a tiny ratchet that fits only its own nuts.
Check the spare before the road trip, not during it. Walk to the back of the car and confirm the spare is there, that it holds air, and that the tools to mount it are present. Owners’ manuals for many vehicles limit a temporary spare to roughly 40 to 50 miles and a top speed around 40 to 45 miles an hour, so treat it as a tool for getting to a shop, not for finishing the trip.
Fill the fuel tank before long stretches, too. A completely empty tank plus a flat tire can leave you stranded, and a roadside truck carrying fuel is a long wait.
Step-by-Step: How to Handle a Tire Blowout at Speed
Here is the sequence in the order it actually happens. Work down it and the car will slow in a straight line while you decide where to stop.
- Stay calm and grip the wheel with both hands.
- Ease off the accelerator and let the car slow on its own.
- Turn on the hazard lights and pick your stopping place.
- Steer smoothly toward that place and pull fully off the road.
- Set the parking brake and make the area safe before you exit.
- Inspect the tire and decide whether it can be driven on.
- Mount the spare or call roadside assistance.
Step 1: Stay Calm and Keep Both Hands on the Wheel
Put both hands on the wheel at the nine and three positions. That grip keeps you from being yanked off center by the force of the blowout, and it is the single thing that matters for the first fifteen seconds.
The front tire on the driver’s side is the one drivers fear most, and that fear is earned. When that corner loses air, the pull is toward the center of the road, into oncoming traffic. If you hold the wheel firmly enough to feel every road texture through your palms, you can hold the car on its original line while you decide what to do next.
Do not look at the tire. You already know what happened. Watch the lane ahead and the mirror, and treat the vehicle in front of you as the object in your way.
Step 2: Ease Off the Accelerator and Maintain Control
Lift off the gas gradually. Engine braking will pull the car down in a straight line, and the steering stays light and predictable. Avoid any sudden steering input while you are still moving fast.
There is one situation where a little extra throttle helps. If the damaged section of tire has shredded and the car feels unstable or fishtails slightly, a gentle, steady nudge of the accelerator can press the flapping rubber back against the road and settle it. It is a smoothing tool, not a speed-up tool. Anyone flooring the accelerator is doing the opposite of what this step asks for.
You will also feel a strong pull toward the failed side. Resist the urge to correct it hard. Small, calm corrections toward the damaged side keep the vehicle straight; big ones start a fishtail.
Step 3: Steer Toward a Safe Place to Stop
Flick on the hazard lights now, while both hands are still on the wheel. In most states with move-over rules, hazards are the signal you need when you cannot reach a shoulder and have to slow in lane instead.
Then scan ahead and choose your place to stop in this order of preference: a full-width shoulder, a wide turn lane, an exit ramp, a paved parking lot, a flat stretch of road with room to the right. Pick it early and commit to it. Changing your mind at fifty miles an hour is how cars end up sideways.
Also pick your place out of traffic, not just out of the lane. A right-rear blowout on a two-lane road pulls toward the shoulder, which is exactly where oncoming traffic sits. If that describes your situation, staying in your lane and slowing gradually is safer than steering onto a narrow shoulder.
Step 4: Pull Completely Off the Road
Move over in one smooth pass. Signal early, check the mirror and blind spot, and drift gradually rather than crossing lanes at an angle. On a divided highway, make all lane changes toward the shoulder in the same direction the road flows.
Get as far off the paved surface as the ground allows. On a soft shoulder the car will drop a little on the flat, which is fine. Leave yourself space between your car and the traffic lane, then set the parking brake, shift into park or low gear, and switch off the engine.
In a construction zone with no shoulder, slow in your lane and signal. Stop as close to the right edge as you can, hazards on, and accept that you will be sitting in the lane. Freeway shoulders are not continuous, and sometimes the nearest safe spot is a hundred yards behind you.
Step 5: Make the Vehicle and Roadside Area Safe
Before you open a door, look at your mirror. Get out on the side away from moving traffic, put on the reflective vest, and stand behind a guardrail or a solid barrier if there is one. If there is no safe place to stand, staying in the vehicle with the seat belt on is the better option.
Set the triangles: one behind the vehicle, the rest spaced along the shoulder to the rear with your lights on. Turn on the hazard lights and leave them on. At night or in rain, this matters more than the triangles do, because approaching drivers see the flashing lights long before they see a dark car.
If you have a flashlight, aim it at oncoming traffic while you work. Never work on the far side of the vehicle facing traffic, and keep an eye on the mirror the whole time you are crouched down.
Step 6: Inspect the Tire and Decide Whether to Drive
Look at the tread face first. A cut, nail hole, or small gouge in the tread area that sits above the wear bar may be patchable, though a blowout that shredded rubber usually is not. Read the tire for exposed belts or cords; if you see them, the tire is finished.
Now look at the sidewall. Bulges, cuts, scuffs to the cord, or a bubble mean the carcass is compromised and the tire cannot be driven on or repaired. A sidewall failure is the most common way a blowout happens in the first place, because the sidewall carries the flex and the load.
Check the rim too. A shiny scraped arc or a bend means the wheel is damaged, and a tire mounted on a bent rim will not seat properly no matter how it looks inflated. Also take a quick look at the tire opposite the failed one, since a blowout throws debris and often leaves uneven wear.
If you have a gauge, compare the failed tire with a tire on the opposite side of the car. A difference of several pounds confirms one is low. Reading a completely flat tire tells you nothing useful, so only bother if the tire still holds air.
Never patch or plug a sidewall, and never inflate a tire that has visible structural damage just to see whether it holds. If you are unsure whether the damage is structural, do not drive on it. Run-flats and some tires with internal sealant can lose pressure slowly enough to drive a short distance at low speed; verify the tire and wheel, keep it under about 30 miles an hour, stay close to home, and get it replaced properly within a day or two.
Step 7: Replace the Tire or Call Roadside Assistance
Changing it yourself makes sense when the vehicle is on solid ground away from traffic, the wheel is undamaged, you have the right tools, and you know the procedure. Follow the owner’s manual for the jack points, wheel chocks, lug sequence, and torque. Those last two matter: chock the wheel diagonally opposite the one you are lifting, and tighten in the star pattern.
Some drivers add a dab of anti-seize on the studs of a wheel that has been off before. It is not required, and it is not something to do on a wheel you have never removed, so skip it if you are unsure.
Call roadside assistance when traffic is close and fast, when it is dark, when the ground slopes, when the rim is damaged, when the vehicle has no usable spare, or when the tire cannot be driven on. Put out the call with your exact location, the vehicle make and model, the tire position, and whether a spare is present. Move the vehicle to a tire shop only if the tire is genuinely drivable, and follow your manual’s distance limit.
Common Mistakes
Each of these is a reflex, not a thought, which is why they are worth rehearsing. The correction is short; the habit is the work.
Stabbing the brakes. The most common and most damaging reaction. A locked or sharply braked tire has almost no grip, and the car rotates around it. Correction: no brake pedal until you are below ordinary city speed or fully stopped. Make yourself say it before the trip, because you will not remember deciding it in the moment.
Yanking the wheel toward the side the car pulls. Overcorrection is how a straight-line blowout becomes a spin. Correction: hold the wheel and let it go where the car takes you for the first few seconds, then make small, smooth inputs.
Stopping in a travel lane or on a curve. This is what turns one tire failure into a pile-up. Correction: hazards on immediately, choose a stopping place with sight distance in both directions, and if no safe place exists ahead, keep going slowly and take the next one behind you.
Getting out to look before making the scene safe. A driver stepping into a live lane is at far more risk than the flat tire. Correction: mirror check, vest on, triangles out, then assess.
Driving on the shredded tire to reach the next town. Distance from the blowout is not the deciding factor; whether the sidewall and rim are intact is. Correction: rim or sidewall damage means the car stays put.
Assuming a temporary spare is a real spare. Compact spares are limited to short distances at low speed. Correction: spare to the nearest tire shop, full stop, no highway laps.
The prevention side is simpler than the emergency side. Check cold tire pressure monthly and before every long drive, against the number on the driver’s door jamb rather than the number molded into the sidewall. Rotate tires on the schedule in your manual, watch tread depth and sidewalls for cuts or bulges, replace tires when they reach the wear bars regardless of how much tread looks like it is left, and stay inside the vehicle’s load rating. Underinflation is the leading cause of highway failures: a tire a few pounds low flexes more with every rotation, the heat builds, and the rubber eventually lets go.
Carrying roadside assistance on a road trip is cheap peace of mind, and it is the backup for the trip where everything else works perfectly until it doesn’t.
Frequently Asked Questions
What happens if a tire blows on the highway?
A blowout at highway speed sounds like a bang and throws the car toward the failed side. The tread often shreds into the road, the rim drags, and the vehicle pulls and may fishtail. Most drivers keep control if they hold the wheel, stay off the brakes, and let the car slow while steering straight. Plan on 60 to 80 miles an hour: control can be lost in seconds.
Should you brake hard when a tire blows out?
No. Braking hard on a blown tire locks that wheel and removes nearly all of its grip, which is what spins the car. Hold the wheel firmly, lift off the accelerator, and let engine braking slow you. Apply the brakes only after the car is nearly stopped or you are already at low speed.
Why is a front tire on the driver’s side the most dangerous?
A failure on the driver’s side front pulls the vehicle toward the center line, into oncoming traffic, and that corner is close to your hands on the wheel, so the jolt hits the steering hardest. A rear failure pulls toward the shoulder, where there is usually more room. That is why most driving schools drill this position first.
What to do if you blow a tire and have no spare
Stop as far off the road as possible, set the triangles, and stay in or beside the vehicle only where it is safe. Call roadside assistance rather than driving on a shredded tire. If the tire is a run-flat that held pressure enough to limp, or sealant protected the tread, you can drive slowly to a shop within the tire’s stated distance limit.
How long can you drive on a blown-out tire?
On a tire that has lost pressure, the honest answer is as little as possible. Every mile destroys more sidewall and rim, and the ride gets less stable the further you go. Only drive on a tire that is structurally intact, holds pressure, and has no rim damage, and then only at low speed to the nearest repair shop.
What causes a tire to pop?
Underinflation is the most common cause, because a low tire flexes with every rotation until heat builds and the sidewall fails. Worn or old rubber, overloading the vehicle, overinflation, potholes and debris, curb strikes, and heat build-up at sustained high speed all play a part. A TPMS warning light is the one warning most drivers get before it happens.
What to Do First
If a tire blows while you are driving, do this in order: grip the wheel with both hands, keep off the brakes, lift off the gas, steer straight, turn on the hazards, then pull as far off the road as you can and stop. That is the whole response. Practising how to handle a tire blowout at speed in words before it happens is what makes it automatic when the bang comes.