
A flat tire is an inconvenience, not an emergency, and learning how to change a flat tire step by step turns a bad afternoon into a twenty-minute detour. The whole job is: find firm ground, set the parking brake, loosen the lug nuts while the wheel is still carrying weight, jack the car at the factory pinch flange, swap the wheel, then tighten in a star pattern. Most people get it done in 15 to 30 minutes, and almost all of the anxiety is about starting, not about the physical work.
This guide is written for anyone who drives a rental car across a desert or simply wants the skill parked in their head before they need it. Read it once in a driveway with a working jack on a weekend, and the roadside version will feel boring. That is the goal.
If your car has no spare, if the wheel is damaged rather than just flat, or if you are on a hill with no firm ground within reach, stop and call roadside assistance instead. None of those situations improve with a bottle of courage.
Table of Contents
- What You Need
- Step-by-Step
- 1. Find a Safe Place to Stop
- 2. Check the Vehicle and Spare Before Lifting the Car
- 3. Loosen the Lug Nuts Without Removing Them
- 4. Position the Jack and Raise the Vehicle
- 5. Remove the Flat Tire and Inspect the Wheel
- 6. Install the Spare Tire
- 7. Lower the Vehicle and Tighten the Lug Nuts
- 8. Inflate, Check, and Secure the Spare
- Common Mistakes
- Frequently Asked Questions
- Can I safely drive on a temporary spare tire?
- How long does it take to change a flat tire?
- What should I do if a lug nut will not loosen?
- Should I put air in a spare tire before a trip?
- Is it safe to jack up a car on soft ground?
- When should I call roadside assistance instead of changing the tire?
- Conclusion
What You Need
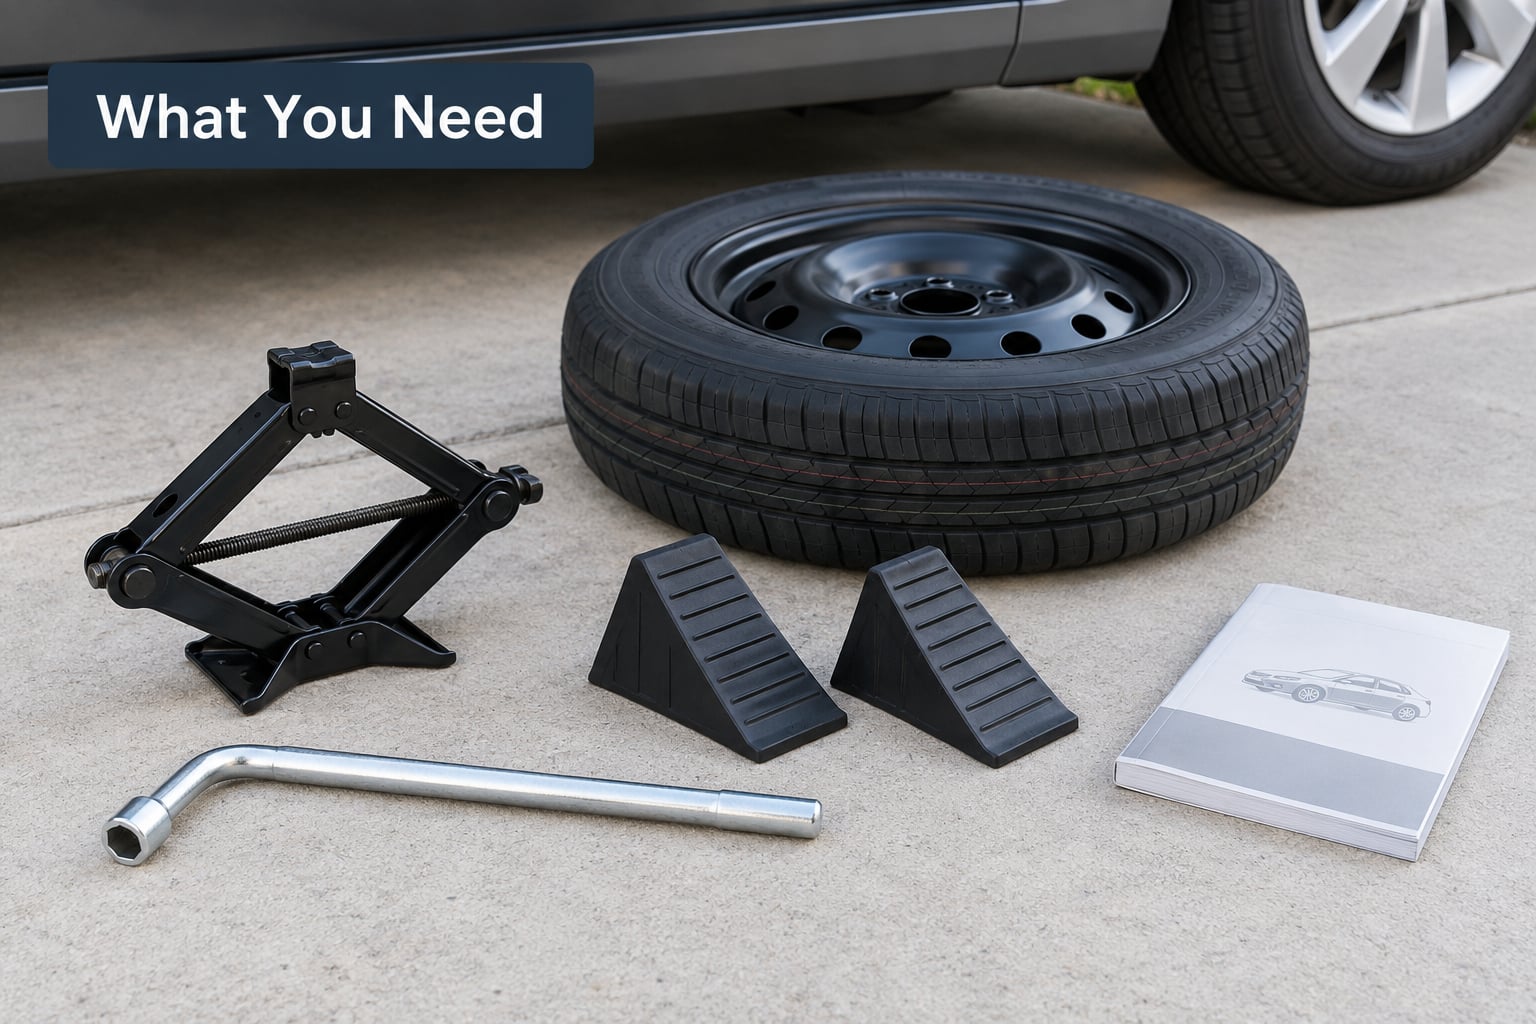
Four items are non-negotiable, and everything else is about comfort and safety. Each one has a job, and each one has a workaround if it is missing from your car.
- Spare tire. It replaces the flat wheel. If the car has none, check for a sealant and inflator kit, or plan on calling roadside assistance.
- Car jack. It lifts the corner off the ground. Do not improvise with a wedge or a board.
- Lug wrench. It loosens and tightens the lug nuts. A breaker bar and the correct socket will work in a pinch.
- Wheel chocks. They stop the car rolling while it is raised. A large rock or a wedge of wood behind the diagonal wheel does the same job.
- Owner’s manual. It holds the jack points, the tightening figure, and the spare’s speed limit. If the manual is gone, look the model up online before you start.
- Reflective triangle. It warns passing traffic at night. Without one, hazards on and a spot with less traffic will have to do.
- Flashlight and tire gauge. For night work and pressure checks. A phone flashlight and a fuel-station gauge are fine substitutes.
Two things about the spare itself deserve a sentence. A compact spare is a different tire from the one on the road, not a thinner version of it, and it lives under the cargo floor or in the trunk well rather than standing upright with the rest of the luggage. If your car was built without a spare, check the cargo area before you trust the inventory on the passenger floor, because the kit can be a compressor, a bottle of sealant, or nothing at all.
You also need to confirm the jack suits the vehicle. A bottle jack sits under a pinch weld and needs a rated support point. A scissor or trolley jack slides under a sill or a designated jacking point, and the owner’s manual says which type your car uses. Guess wrong and you will crush a pinch weld, which is a repair that runs far beyond a tire change.
A short pre-trip habit pays off well: check the spare’s pressure and the pressure of the other three tires once a quarter. A spare that has been sitting under a cargo floor for a year usually loses air, and you will not find out until the day you need it.
Step-by-Step
The procedure below stays in one order for a reason. Each step depends on the one before it, and skipping ahead is what leaves people crawling down the road with a loose wheel. Read the whole thing once before you touch a tool.
1. Find a Safe Place to Stop
Drive as far off the roadway as you safely can. A parking lot beats a shoulder, and a wide shoulder beats a narrow one. Set the hazard lights on, pull the parking brake hard, and put the transmission in park or first gear depending on your vehicle.
The surface has to be firm, level, and free of soft ground. Sand, mud, fresh asphalt, and sloped driveways all let a jack sink or let the car lean as you work. You can tell the ground is unsuitable when the jack starts to dig in as you pump it, and at that point you should move the car rather than force it.
Set out a reflective triangle behind the car if you have one, well back from the vehicle. Chock the wheel diagonally opposite the flat one before anything else happens, because a raised corner makes the car want to roll.
2. Check the Vehicle and Spare Before Lifting the Car
Open the owner’s manual and find the jacking points for your specific model. Most manufacturers mark them with a small triangular symbol or a notch in the sill, usually behind the front wheel or just ahead of the rear wheel on each side. There is often a second reinforced point in the same place for lifting the whole side.
Look at the spare before it goes anywhere near the car. A full-size spare that has been used before may have a patched sidewall or a visible repair. A compact spare should show no cracks, bulges, or cord showing through the rubber. If it looks damaged, you are looking at a tow, not a tire change.
Electric and hybrid vehicles add one warning here. The high-voltage battery pack usually sits low and runs the length of the floor, and the approved jacking points may be narrower or positioned differently than on a petrol car. Use the points in your manual and nothing you have seen on another vehicle. Never jack a car in a way that loads the underside of a battery pack.
You will know the checks passed when you can point to the two approved jacking points on your car, the spare is sound, and the lug wrench fits the nuts.
3. Loosen the Lug Nuts Without Removing Them
Leave the parking brake on. Using the lug wrench, break each lug nut loose by about a quarter turn, working around the wheel in a circle so the load comes off evenly. The nuts should still be seated on the studs at this stage, and the tire stays on the ground doing its job of holding the car steady.
Turn counterclockwise. Most nuts are right-hand threaded, which feels backwards to anyone who has only ever fitted a bolt.
Stuck nuts are the single most common reason a change turns into an afternoon. Rusted seats and over-tightened nuts will not move with a short bar. Soak them with a penetrating spray, leave it for several minutes, then try again with a longer handle for more leverage. Some wheels use headcap-style nuts that need a matching socket, and others use locking nuts that need a specific key, both of which should be in your car’s kit. If one nut still will not budge after all that, that wheel is a job for a shop with an impact wrench.
4. Position the Jack and Raise the Vehicle
Find the pinch flange, the reinforced seam just behind the door opening that carries the car’s weight. Place the jack head directly under the approved point, with the jack’s ratchet or scroll lined up with the vehicle sill so a lowered handle cannot slip out from under the car.
Pump or turn the handle until the tire clears the ground by about an inch, which is roughly the clearance you need to pull the wheel off. You do not need to lift the car any higher, and going higher than necessary adds nothing but instability. On a hydraulic jack, lower the release valve a quarter turn to drop the corner back down.
5. Remove the Flat Tire and Inspect the Wheel
Take the lug nuts off now and place them somewhere safe. A wheel cover or hubcap, if the car has one, usually pries off with the flat end of the lug wrench, but check for retaining clips first. Once the nuts are off, slide the wheel straight off the studs rather than rocking it, then lay it flat so it cannot roll into traffic.
Look at the studs and the inside of the rim while they are exposed. A wheel that took a serious impact can be bent even when the tire looks reusable, and a broken or worn stud will not hold a nut properly. Any of that means the vehicle needs a tow.
This is also the moment to look at the flat. A puncture in the tread area is usually a repairable object, while a blowout on the sidewall means the tire is finished. Mechanics generally treat it that way too, and knowing which you have saves you an argument at the shop later.
6. Install the Spare Tire
Push the spare onto the studs straight, lining up the first hole before you force anything. If the nuts go on by hand for the first few threads, the wheel is going on straight. Crossed threads feel wrong immediately, and backing it out costs less time than stripping a stud.
Check the valve stem position before you tighten anything. On a compact spare with the foam spacer, the valve stem points outward, away from the vehicle, and the foam holder sits against the wheel. Getting it backwards is one of the most common beginner mistakes there is, and the wheel will not sit flat against the hub if it is reversed.
Fit the lug nuts by hand first, turning each a few turns clockwise until every nut is snug against the hub. Snug is not tight, and it is enough to hold the wheel in place while you lower the car.
7. Lower the Vehicle and Tighten the Lug Nuts
Lower the car until the tire touches the ground but the weight is not fully back on the wheel yet, which leaves the jack carrying enough load for the nuts to tighten properly. Tighten each nut firmly in a crisscross star pattern: top nut first, then the one diagonally opposite, then the next one across, working around until every nut has taken the same tightening.
Star pattern is the whole point. Tightening in a circle pulls the wheel evenly against the hub the first time round and leaves one tight nut and four loose ones when you go round a second time. Most of the lug nuts that feel loose after a roadside change were tightened in a circle.
Then lower the vehicle fully, remove the jack, and tighten again with the wheel on the ground. Your owner’s manual gives the correct tightening figure for your vehicle, and that number governs. Skip it if your car uses a torque wrench at the wheel, and if you do not have one, have the nuts checked at the next tire shop.
8. Inflate, Check, and Secure the Spare
Compare the spare’s pressure against the figure on the driver’s door placard or in the manual, and inflate it while it is still on the car. A compact spare loses pressure faster than a road tire because it is a temporary design, so check it every time you get back to a pump.
Read the sidewall for the speed limit. Many compact spares are marked for a maximum speed around 50 mph, and going faster on one is genuinely risky. Treat that number as a ceiling, not a target, and get the flat repaired or replaced before you need to plan around it again.
Put the tools, the jack, and the flat tire back where they came from, because an unsecured wheel inside the cabin is a projectile in a sudden stop. Remove the chocks, and check the other three tires’ pressures while you are at it.
Common Mistakes
These are the errors that show up over and over, and each one has a straightforward fix.
- Jacking at the wrong point. The pinch flange is the only reinforced area designed to take the load. Jacking on a thin sill bends the metal and turns a tire change into a body repair. Use the marked point in your manual.
- Working in or next to live traffic. A shoulder or a parking lot edge is where most injuries happen. Drive farther than feels reasonable, turn on hazards, set a triangle back, and take your time.
- Loosening the lug nuts after jacking. With the wheel off the ground the car hangs on the jack, and the weight of the vehicle fights you. Loosen first, on the ground, and only then lift.
- Tightening in a circle. Even star pattern, twice: once with the weight still on the jack, once with the car back on the road.
- Putting the compact spare on backwards. The valve stem faces outward, and the wheel should sit flush. If it rocks, it is reversed.
- Forgetting the temporary-spare limits. Compact spares carry their own speed limit on the sidewall, and many are for short distances only. Know the number before you rejoin fast traffic.
- Driving away without checking the spare’s pressure. A year-old spare under a cargo floor is usually low. Inflate it while the wheel is still on the car.
- Losing the nuts. Keep them in a pocket, a cup, or the hubcap rather than dropping them under the car. Half a set is not a set.
Two more habits worth building in. At night, use a flashlight set on the ground so the light points up at the work, and wear something visible if you have it. In rain, an old jacket beats a hood that blocks your view of the jack point, and wet ground is exactly when people skip the manual and guess.
If you do it once in a driveway before you need it, every one of these mistakes gets easier to avoid.
Frequently Asked Questions
Can I safely drive on a temporary spare tire?
Yes, but slowly and only as far as you need to reach a tire shop. Most compact spares are marked with a maximum speed of around 50 mph on the sidewall, and many manuals limit distance to roughly 50 to 70 miles. Treat the lower of those limits as your ceiling, keep off highways, and get the flat repaired or replaced as soon as possible. The spare is a short-term solution, not a second set of road tires.
How long does it take to change a flat tire?
Expect 15 to 30 minutes for a first-timer with the right equipment, and closer to 10 minutes once you have done it before. Most of that time goes into setup, loosening stiff nuts, and putting everything away. If a nut will not move, if the wheel is damaged, or if the ground is soft, allow extra time. Practising the change in a driveway once removes most of the uncertainty before a real roadside situation.
What should I do if a lug nut will not loosen?
Do not force it with a short wrench. Soak the nuts with a penetrating spray, leave it several minutes, then retry with a longer bar or a breaker bar for extra leverage. Some wheels use headcap-style nuts that need a matching socket, and some use locking nuts that need a specific key, both of which should be in your car’s kit. If one nut still will not budge after that, call roadside assistance rather than risking the car on a jack.
Should I put air in a spare tire before a trip?
Yes, check it before you leave rather than after you need it. Compare the spare’s pressure with the figure on the driver’s door placard or in the manual, and inflate it while it is still in the car. Spares lose pressure over months sitting unused, and a compact spare in particular can lose enough air to look visibly low. A quarterly check of the spare and the other three tires keeps the whole set honest.
Is it safe to jack up a car on soft ground?
Not reliably. Sand, mud, wet grass, and fresh asphalt let the jack sink, and the car can tilt or drop while it is raised. Move the vehicle to a paved, level surface before lifting anything. If you are stranded somewhere with only soft ground and no firm shoulder in reach, that is roadside assistance territory. A jack under a pinch flange needs a solid base to push against, and no amount of careful pumping fixes that.
When should I call roadside assistance instead of changing the tire?
Call for help if the vehicle has no usable spare, if the wheel or a stud is damaged, if the ground is too soft or too sloped to support the car, if the tire is a run-flat or a temporary spare already at its limit, or if the lug nuts will not loosen with the tools you have. Any of those situations turn a 20-minute job into a safety risk, and roadside assistance exists for exactly this reason.
Conclusion
Start with the owner’s manual, every time. It tells you the jacking points, the tightening figure, and the spare’s limits, and those three details are the difference between a clean roadside change and a damaged car.
When the vehicle cannot be safely supported on firm ground, or when the wheel or studs are damaged, arrange professional help rather than improvising. If you can do it safely, the job is short and predictable: loosen on the ground, jack at the pinch flange, swap the wheel with the valve stem outward, lower, and tighten in a star pattern twice.
Before you drive on, check the spare’s pressure against the door placard, read the speed limit on the sidewall, and pack the tools away so nothing rolls around the cabin. Then get the flat looked at so the spare is not the next thing you need. If there is one thing years of car ownership teach, it is that preparation beats improvisation every single time.